If you need to purchase additional email credits, click here
- On the left navigation bar, hover over Emails, then in the submenu, click on Send an Email
- The platform has six steps to detail the entire process of creating and sending an email campaign.
Add Basic Information
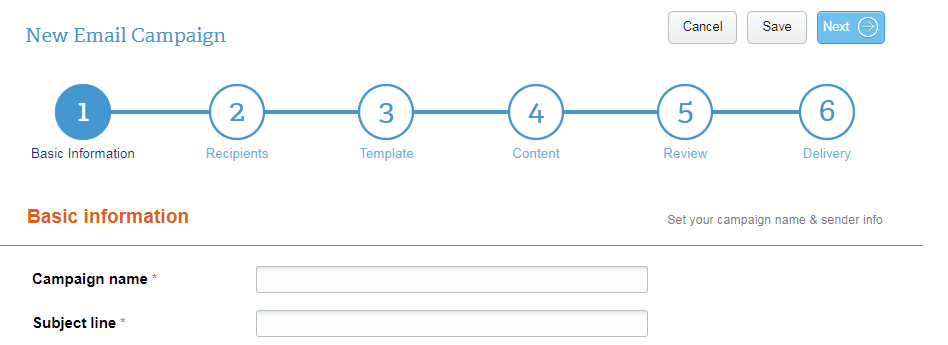
Fill out the required basic information fields, then click Next.
Campaign Name refers to the title by which you’ll refer to this email in your records. It only shows up in your Manage Emails tab under this name, which is not visible to members. Sender address will auto-populate if you’ve previously entered this information in the member info tab.
Note: The address entered in this section will automatically appear in the lower left corner of your email. You are legally required to include a valid physical postal address.
Select Email Recipients
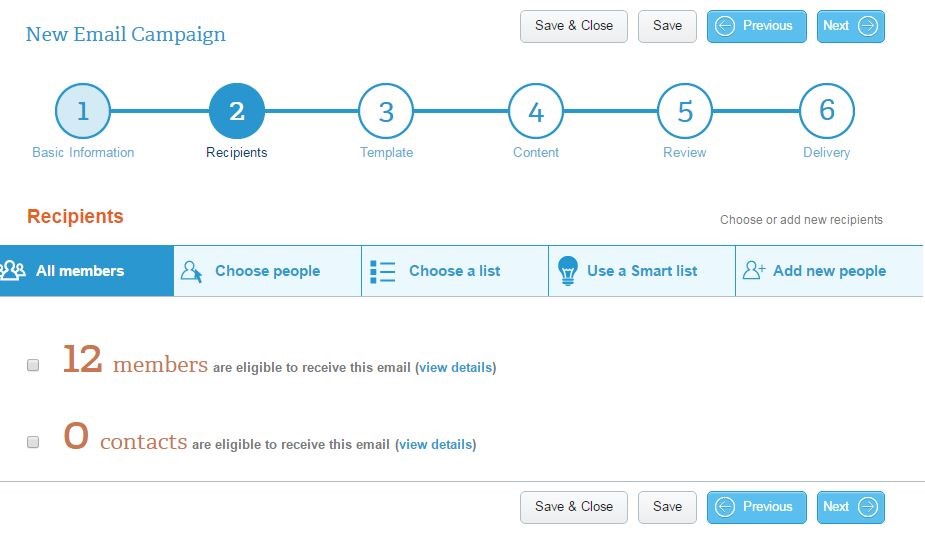
Admins can choose to send emails to all members and/or contacts. Moreover, you can send to specific group members, add new recipients manually, or from a previously-created distribution list, all with only a few clicks. There are different ways to add recipients:
Select individual members or contacts
Note: Email credits do not roll over to the next month.
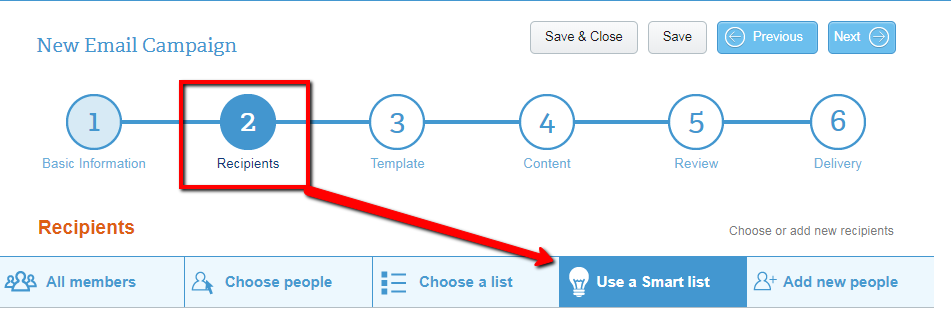
Use a Smart List:
Pro and Premium subscriptions
A Smart List is a distribution list populated by dynamic queries based on member actions and statuses. For example, Smart Lists can be created based on a group’s member levels, or those who’ve RSVP’d to an event.
- In Step 2. Recipients of building your email campaign, select Use a Smart List
- Click the Select Members By dropdown menu and choose a category
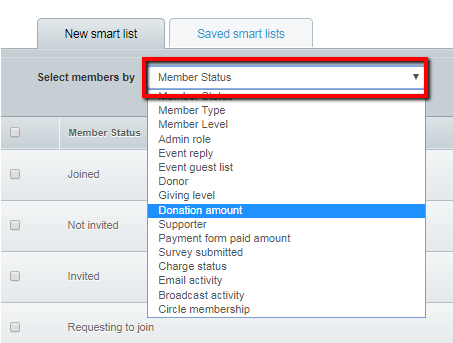
- Choose a list of recipients from the list(s) that appears
Note: Depending on the Smart List you wish to create, you’ll select the criteria of the list. For example, a Smart List based on email activity has the option to include members who clicked within or opened an email. If the list is based on donors, you’ll select from the options of donor amount, a specific giving level, or all donors. You will have the option to view members.
To save the Smart List for future use, select the Add this to My Saved Smart Lists checkbox and name your list.
Other options for choosing recipients:
- All Members: Select to send to all your members, contacts, or both in one click.
- Choose People: Select individual members or contacts from your group.
Note: You can only add members from one page at a time using this method. Make sure you press Save & Close before moving on to a new page.
- Choose a List: Select a distribution list you’ve previously created. (Learn how to create a distribution list.)
- Add New People: Enter new people not otherwise associated with your group. They can be added individually, or uploaded from a separate email list.
Note: Newly added people in this section are categorized as contacts, not members.
Choose a Template and Add Content
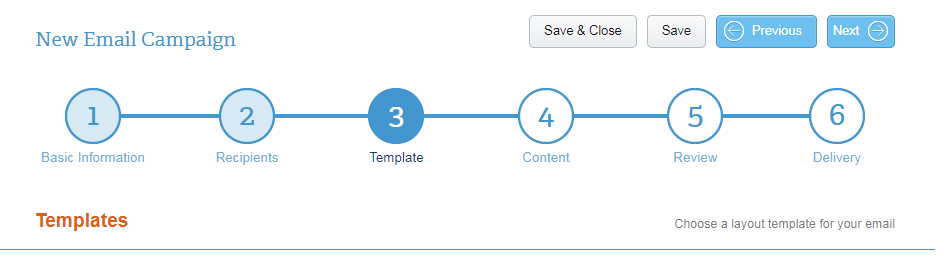
Templates will help you create an attractive email that is fully customizable with HTML content, buttons, and personalized elements. The template options are displayed in a filterable list.

- Select the other pre-designed templates to build email that most closely aligns with your email goal. You can filter templates by organization, such as Greek, Church, or Nonprofit among others, to quickly access relevant templates.
- Select Basic Templates to craft an email with the least amount of pre-built design, so you can fully customize your email with tables.
Save time by creating and saving email templates for future use. Access a saved template by selecting the My Custom Templates filter.
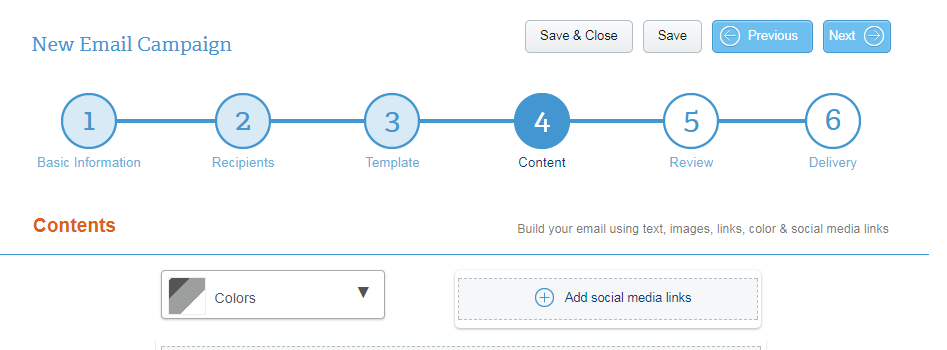
Add Content
You can customize your content within the confines of your chosen email template.
- Click inside the template window to bring up the Editor Tool
- Use the editor to add your content
There are also six pre-programmed buttons that allow you to insert information from other sections of your group:
Images: Upload an image from your PC. (580 pixels)
Personalized Text: From the dropdown menu, select how you’d like to address your recipients. All information, such as name and email address, is pulled from membership data. This allows each recipient’s email to appear directed specifically to them without sending one to each person.
Buttons: These are one-click elements for recipients to reach your payment forms, Donation Sites, surveys, and the join-the-group process.
Note: Only one button can be added per email.
Documents: If you’ve linked your group to a Box.com account, you can attach documents as files using this feature.
Form Data: Personalize your email campaign by using the recipient’s answers to a question from one of your forms.
- Click on Add Follow Us Links at bottom of the email window to add social media links that allow members to easily follow your group on your preferred platforms
- Click on Add Social Media links at the top of the email window to enable sharing by members on the selected platform
- Select Add Banner Image (580 pixels) to include a specific image for your email
- For example, the image you use for your group page.
- Preview your email creation progress by selecting either the View as Web Page or Send Me Test Copy function
Review and Determine Delivery
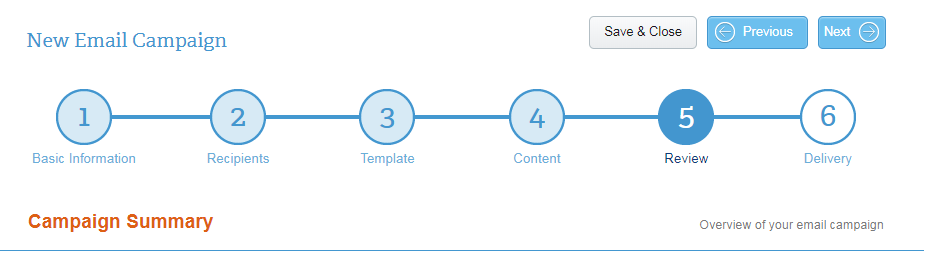
Once you have created your email, review to ensure all the elements, such as recipients and links to social sites, were successfully added.
Click the Save This Email as a Template button if you’d like to reuse the design. Next time you send an email, all you’ll have to do is update any content changes.
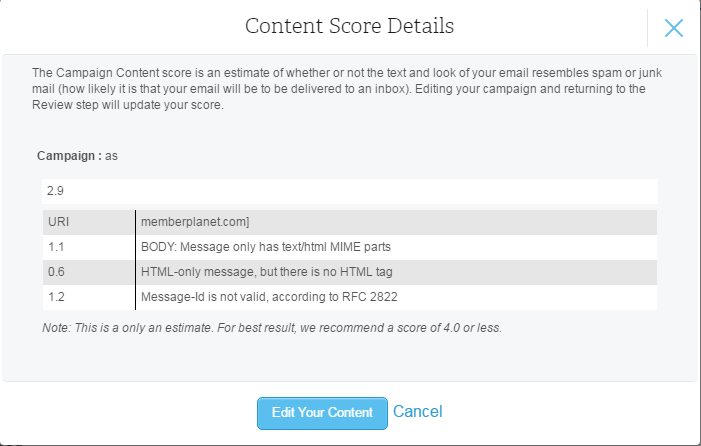
Campaign Score: Use this tool to estimate whether or not the text and look of your email resembles spam or junk mail. We recommend a score of 4.0 or less to minimize likelihood your email isn’t delivered properly.
Determine Delivery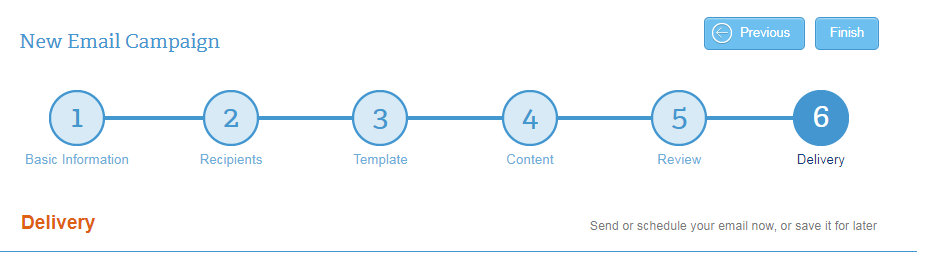
- Choose one of the delivery options:
Send this email now
Send this email later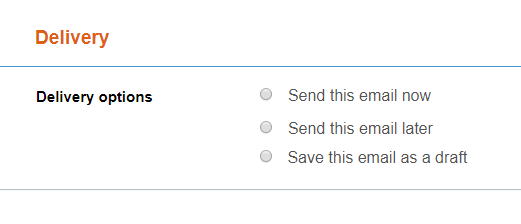
If you opt to send your email at a later date: - Enter date and time you’d like your email to send
Note: To select multiple date and times, click the checkbox and enter the remaining dates and times.
Save this email as a draft - Click Finish to complete your email creation process