Creating a site for your club comes with a long list of benefits. Your site acts as the official public face of your club, allowing you to increase visibility and share information with your members, prospects, and anyone else who interacts with your club. Your members can log in to their account to view their private dashboard directly from your website, putting all the info they need in one place. Site Builder is a feature that empowers you to create and maintain a site – including multiple pages within it – and you don't even need to know any HTML! Site Builder’s drag-and-drop functionality is intuitive and easy to learn.
Before getting started, log in to your memberplanet admin portal. Your club admin permissions will allow you to have access to Site Builder once you are logged in.
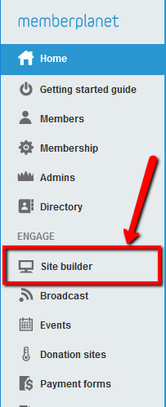
1. In the left navigation sidebar, click Site Builder
1. In the left navigation sidebar, click Site Builder
2. Select the Edit Site button
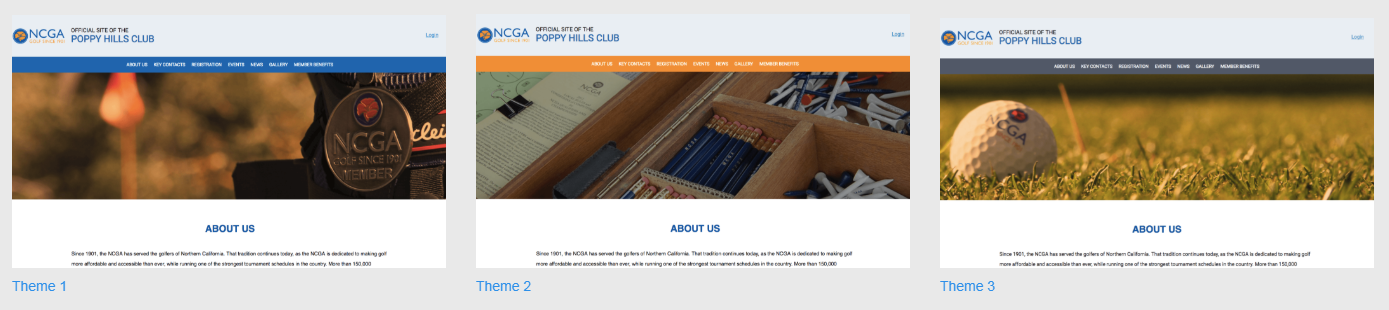
3. Select a theme
3. Select a theme
Themes are skins or visual styles that can be applied to your site without affecting your content. When you first create your site, you pick a starting theme, but at any time you can change your theme to change your site’s look and feel. Even if you have added your content and decide to change your theme, you will not lose the content you’ve added. Your content will be preserved and carried over to the new theme.
Club admins will have a choice of three themes:
Club admins will have a choice of three themes:
Select the one you want. Your new site will be set up and you’ll be taken to the editor.
To change your theme at any time:
1. Click on Themes in the top nav bar
To change your theme at any time:
1. Click on Themes in the top nav bar

2. Select a new theme from the options
Note: Remember that this change won’t be seen by visitors on your site until you re-publish your site.
Note: Remember that this change won’t be seen by visitors on your site until you re-publish your site.
Edit and Publish Your Site
Your site is made up of one or more pages. Each page has these main editable components:
Site name/brand
The site name or your club’s logo is at the top of every page, which will already be populated. Here’s a sample of what it looks like:
Site name/brand
The site name or your club’s logo is at the top of every page, which will already be populated. Here’s a sample of what it looks like:

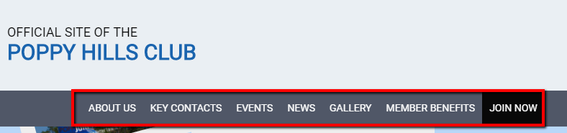
Navigation menu
Your top nav bar contains one or more navigation links. This navigation menu has been determined by headquarters and cannot be edited: About Us, Key Contacts, Events, News, Gallery, Member Benefits, Join Now
Your top nav bar contains one or more navigation links. This navigation menu has been determined by headquarters and cannot be edited: About Us, Key Contacts, Events, News, Gallery, Member Benefits, Join Now
Banner
You can choose one of three banner types for your site by clicking on the Change Banner Type button in the top-left corner of the banner area, which will appear upon mouse hover. These include Single Image, Sliding Banner, and Polaroid Banner. The banner type and banner images you choose will be shown on every page of your site.
You can choose one of three banner types for your site by clicking on the Change Banner Type button in the top-left corner of the banner area, which will appear upon mouse hover. These include Single Image, Sliding Banner, and Polaroid Banner. The banner type and banner images you choose will be shown on every page of your site.


Sliding banner: This banner shows a slideshow of multiple images that fade in and out in the order you determine. After you click the Add Images button and select your images, you can change the order of the images, remove images, or use the image editor to customize the images in the slideshow.
Polaroid banner: This banner takes multiple images that you upload and displays them as though they were a loose pile of polaroid photographs scattered across a table. Just like the slideshow banner, upload your images, put them in order, and edit them as desired.
Single image: This displays a single featured image.
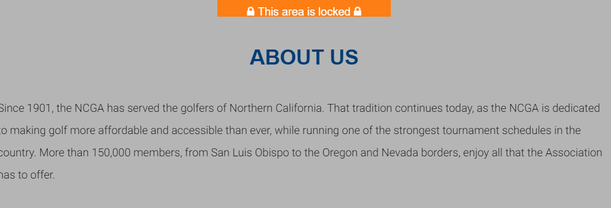
Locked content
There are sections on your site that contain mandatory text written by headquarters. These sections are not editable by club admins. Locked content will display a notification upon mouse hover:
There are sections on your site that contain mandatory text written by headquarters. These sections are not editable by club admins. Locked content will display a notification upon mouse hover:
Main content section
This is the area where you can add your own text and images using the Elements editor.
Footer
The footer is at the bottom of the page. Some portions of the footer have been determined by headquarters and cannot be edited.
This is the area where you can add your own text and images using the Elements editor.
Footer
The footer is at the bottom of the page. Some portions of the footer have been determined by headquarters and cannot be edited.
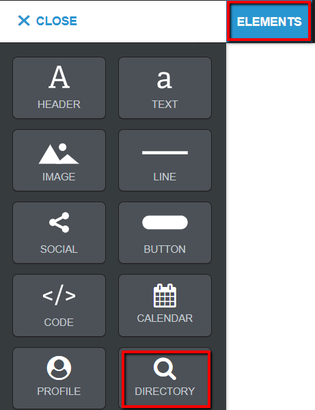
Types of editors in Site Builder
You have an array of site editing tools at your fingertips to create a professional site, including these four main editors in the top nav bar: Elements, Pages, Themes, Settings
Elements editor
Select Elements in the top navigation bar. From here you can add, edit, or remove content such as text and images tor a page on your site. The Elements editor lets you edit content on one page at a time.
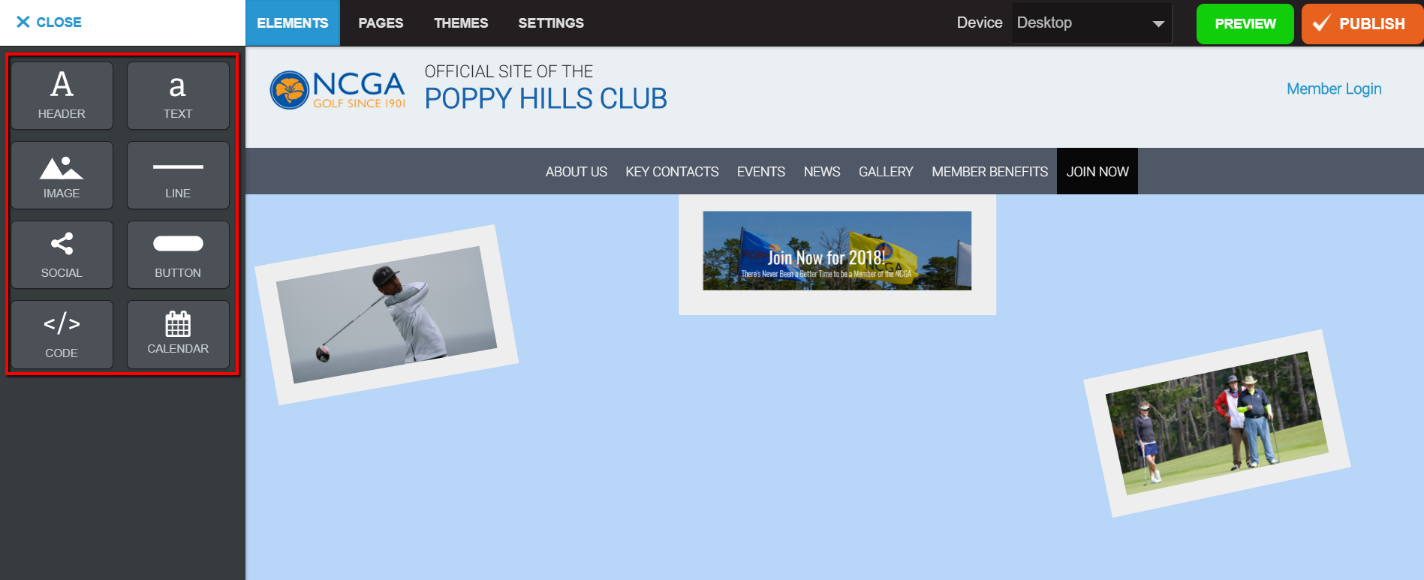
The Elements editor is divided into two main parts:
1. Content palette
2. Page canvas
When you add content to a page, you do it one chunk at a time. For example, you might first add some text to the page, then add an image second, and then add social media links third. Each chunk of content is called a content block and each type of content block is represented by a box in the left-hand sidebar. This sidebar is called the content palette.
Elements editor
Select Elements in the top navigation bar. From here you can add, edit, or remove content such as text and images tor a page on your site. The Elements editor lets you edit content on one page at a time.
The Elements editor is divided into two main parts:
1. Content palette
2. Page canvas
When you add content to a page, you do it one chunk at a time. For example, you might first add some text to the page, then add an image second, and then add social media links third. Each chunk of content is called a content block and each type of content block is represented by a box in the left-hand sidebar. This sidebar is called the content palette.
Pages editor
You can use the Pages editor in the top nav bar to go to a selected page and edit the content on the page.
You can use the Pages editor in the top nav bar to go to a selected page and edit the content on the page.
- In the top navigation bar, click Pages
- In the content palette, select from the dropdown menu whether you want to navigate to Public Pages or Private Pages
- Click the page you wish to edit
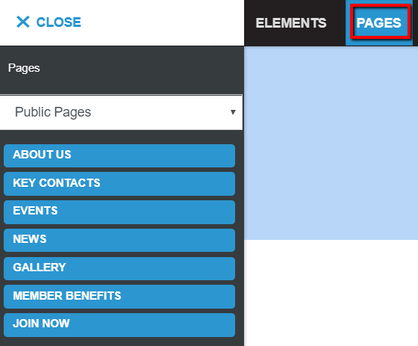
You can also navigate to another page by clicking on the page name listed in the palette.
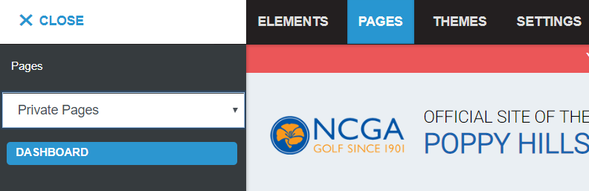
Private pages
Private pages are also called members-only pages because they aren’t viewable to non-members. Your club will have one pre-populated private page, named Dashboard. Your members must log in to view it. This page is editable by club admins. However, club admins cannot add new members-only pages.
Private pages are also called members-only pages because they aren’t viewable to non-members. Your club will have one pre-populated private page, named Dashboard. Your members must log in to view it. This page is editable by club admins. However, club admins cannot add new members-only pages.
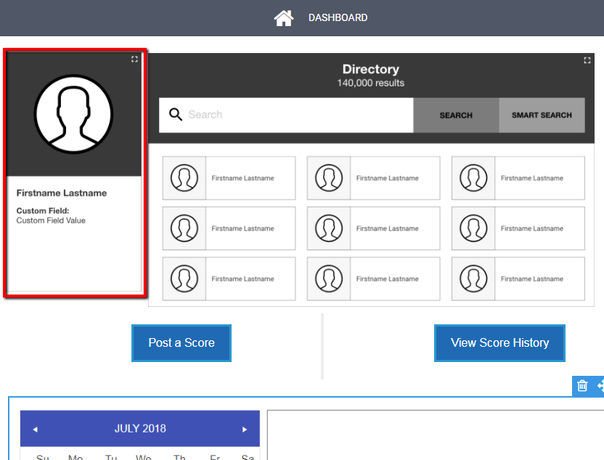
Pre-populated sections in the member dashboard are the member profile, directory, Post a Score button, View Score History button, and events calendar.
Member profile
Each member has his or her own profile. The widget contains the following information: profile photo, member’s first and last name, and a custom field value, which will display the Handicap Index. Club admins cannot edit the information displayed within this widget.
Member profile
Each member has his or her own profile. The widget contains the following information: profile photo, member’s first and last name, and a custom field value, which will display the Handicap Index. Club admins cannot edit the information displayed within this widget.
Member dashboard
Your members will be able to securely log in and view their member dashboard, the private page of your website that includes member profile, events calendar, directory, and related club information.
If your members need to update their profile information displayed on their dashboard, they should notify you so that you can send them an update profile request. They will be able to update their profile via email. Learn more: How to Request a Profile Update
Club admins can move, remove, and re-add dashboard elements: directory, events calendar, and member profile.
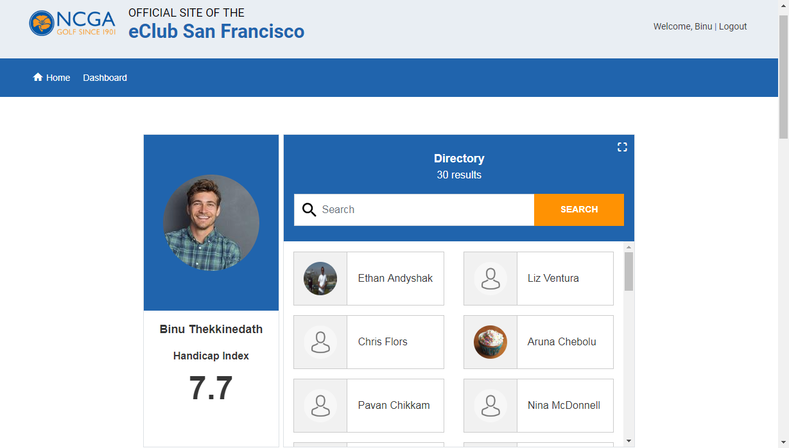
How to preview the member dashboard
You can preview the member dashboard to get a partial view of what it will look like when a member logs in, but you will not be able to see specific member data within the preview. Click on the green Preview button in the top nav bar.
Your members will be able to securely log in and view their member dashboard, the private page of your website that includes member profile, events calendar, directory, and related club information.
If your members need to update their profile information displayed on their dashboard, they should notify you so that you can send them an update profile request. They will be able to update their profile via email. Learn more: How to Request a Profile Update
Club admins can move, remove, and re-add dashboard elements: directory, events calendar, and member profile.
How to preview the member dashboard
You can preview the member dashboard to get a partial view of what it will look like when a member logs in, but you will not be able to see specific member data within the preview. Click on the green Preview button in the top nav bar.

This is a sample preview of what a member dashboard will look like upon log in:
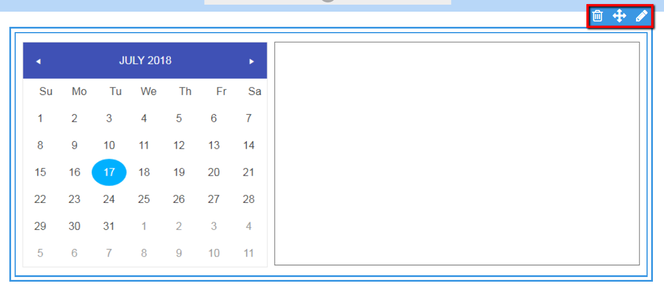
Events calendar
An events calendar can be added to any page, whether public or private, and by default, the calendar will be pre-populated on the members-only view upon login. Admins can move the calendar around, resize it, delete or re-add it as they see fit.
To edit the calendar widget once it’s on the page, hover over it and select the delete, move, or edit icon. The edit icon will allow you to resize it. To edit or add any events, you must do this from the events editor in your admin portal. Learn more: Event Management and Ticket Sales
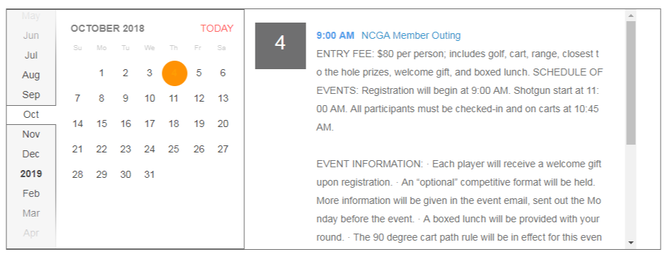
On your published site, the actual event information will populate in the events widget:
Member directory
The member directory is an interactive feature and a great way to let members to search and network with each other. The directory can only be added to the member dashboard, and it is viewable only upon secure login. The contents of the directory will be populated with member data. Your members can edit their own privacy settings and have full control over what info is displayed to other members. Club admins can resize, move, remove and re-add the directory as they see fit.
The member directory is an interactive feature and a great way to let members to search and network with each other. The directory can only be added to the member dashboard, and it is viewable only upon secure login. The contents of the directory will be populated with member data. Your members can edit their own privacy settings and have full control over what info is displayed to other members. Club admins can resize, move, remove and re-add the directory as they see fit.
Add content
To add content to a page:
Note: You can only drag content blocks to the main content area, and you can only add content blocks onto areas that are not locked; the site name and banner are edited in different ways. Most content must be edited after you drag the component onto the canvas. For example, text blocks are empty by default, and images are placeholder icons until you add your own images.
To add the actual content:
Pre-populated elements
Some site pages, element blocks, and buttons are pre-populated so you can conveniently launch your site faster. Some of these elements are locked and cannot be changed by club admins.
- Click a content block on the content palette and drag it to the right, onto the page or canvas
- Drop it into the place on the page that you want it to appear by releasing the mouse button
- To add the actual content: Click on the component itself or the edit icon
Note: You can only drag content blocks to the main content area, and you can only add content blocks onto areas that are not locked; the site name and banner are edited in different ways. Most content must be edited after you drag the component onto the canvas. For example, text blocks are empty by default, and images are placeholder icons until you add your own images.
To add the actual content:
- Text and Header blocks: Click on the content block itself and start typing or paste text into the block.
- Image blocks: Hover over the block and click the edit icon, then select the Edit button to use the image editor.
- Social and Button blocks: Hover over the block and click the edit icon. Add button text and links.
Pre-populated elements
Some site pages, element blocks, and buttons are pre-populated so you can conveniently launch your site faster. Some of these elements are locked and cannot be changed by club admins.
Move elements around on page

To change where something is on your page, you can click and hold the move icon on the content block and drag it to a different place.
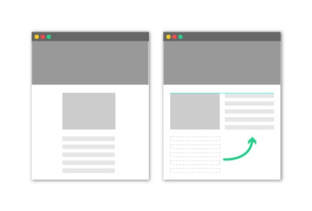
Adjacency
Club admins can arrange elements within a page to create several different viewing options on that page. You can create rows of elements with two or more elements on the same row. Elements will automatically resize themselves to share the width of the page, and the proportional width of each element can be increased or decreased by clicking and dragging the vertical gray lines that appear when hovering over the row.
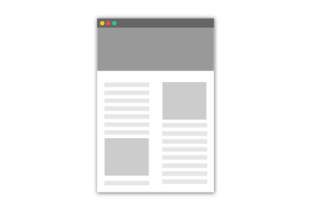
Multi-column layouts
Once you’ve created a row with two or more elements using the new Adjacency feature, you can create columns by dropping additional elements above or below them. Create more dynamic, asymmetrical layouts without any extra menus or screens – just drop your content where you want it to go!
Once you’ve created a row with two or more elements using the new Adjacency feature, you can create columns by dropping additional elements above or below them. Create more dynamic, asymmetrical layouts without any extra menus or screens – just drop your content where you want it to go!
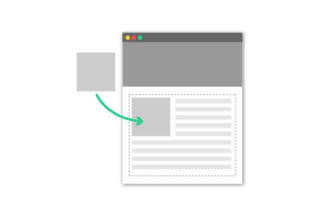
Text wrap
After adding a text element to the page, you can drag an image element into the top-left corner of the text element to add the image into the flow of the text. The image can be manually resized by clicking and dragging the image corner or sides, and the text will continue to seamlessly wrap around the image.
After adding a text element to the page, you can drag an image element into the top-left corner of the text element to add the image into the flow of the text. The image can be manually resized by clicking and dragging the image corner or sides, and the text will continue to seamlessly wrap around the image.
Remove elements from the page

To remove a block of content from the page, click the block and click the delete icon in the upper right corner. Once you delete an element and its contents, this action cannot be undone.
Edit existing content

Each content block has a few different things you can customize by clicking the edit or pencil icon on its component block on the canvas.
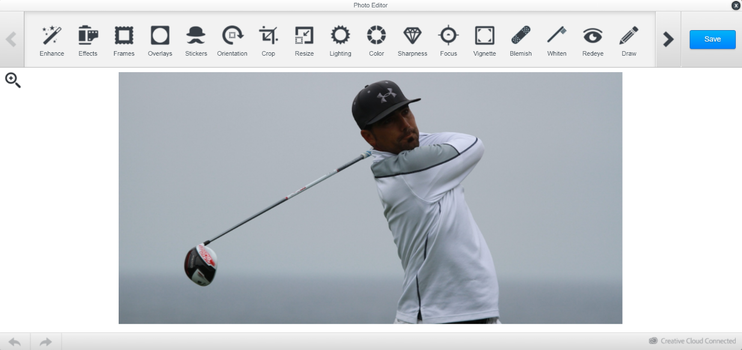
Images
If you’ve already added an image to an image block, when you click the edit icon, you’ll have the option to replace the image. You can also resize an image by clicking on the image and clicking and dragging the blue boxes on the corners and sides.
Clicking the Edit button will open the image editor, which includes graphic design controls for color balancing, adding fun graphics to the image, and adding frames.
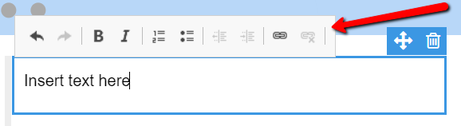
Text
Upon clicking on a text block, some basic formatting tools will appear for you to style your text and add links.
Upon clicking on a text block, some basic formatting tools will appear for you to style your text and add links.
Social media icons
When you click on the content block and click the edit icon, you will be able to add the URL for each social media icon and re-order them. If you don’t have URLs for all of the social media sites, just uncheck the checkbox next to them and they will be removed from your page.
Buttons
Once you click on the content block, you will be able to add a URL to your button. Any URL, including external links or links to forms, can be added.
Save changes
Changes you make in the Elements editor are auto-saved. This will save changes to your draft, but they won’t be visible to site visitors until you publish the site. Your changes will also be saved any time you click off of a content block or leave the Elements editor to go to a different part of the Site Builder.
Note: Because changes are saved automatically and frequently, there is no way to revert to an earlier draft. Undo functions are limited to changes within a content element.
Preview your site
At any time, you can preview your changes by clicking on the Preview button on the top right. In the Device dropdown menu, you also have the option to preview what your site looks like on desktop, tablet, mobile landscape, and mobile portrait views.
Draft mode
Your site will be in draft mode until you are ready to publish it. Until you publish the site, it will remain hidden. Be sure to fill in all of the blank areas and add some images to your banner before you click the Publish button, or they will not be included when you publish your site.
Publish and re-publish your site
Before you publish, it is a best practice to preview your site by clicking the Preview button near the top right. When you are ready to make your site visible to visitors, you can publish it for the first time by clicking the Publish button, which is next to Preview.
Important note: After you’ve published your site, you will always have two versions of it that exist at the same time: a draft version and the published version. When you edit your site and your changes are saved, only the draft version will be changed and stored. When you click the Publish button to re-publish your site, all of your saved changes will be copied from your draft version to the published version, meaning that the changes become visible to visitors on your site. This allows you to make multiple changes to the site and release them all at once instead of exposing your visitors to the changes as you make them one at a time.
Important note: After you’ve published your site, you will always have two versions of it that exist at the same time: a draft version and the published version. When you edit your site and your changes are saved, only the draft version will be changed and stored. When you click the Publish button to re-publish your site, all of your saved changes will be copied from your draft version to the published version, meaning that the changes become visible to visitors on your site. This allows you to make multiple changes to the site and release them all at once instead of exposing your visitors to the changes as you make them one at a time.
Edit Your Site Settings
The settings of your website help determine its visibility to the public and how easy it is for potential visitors to locate your website in search engine results. Adjusting these to your desired specifications with search engine optimization (SEO) in mind will enable you to customize how people view and find your site.
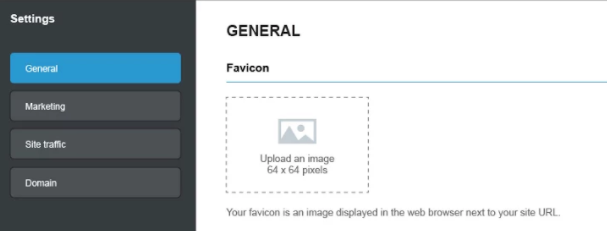
Change your favicon
Your site’s favicon is the small image that is displayed on the far-left edge of the browser tab when someone is visiting your site. Favicons are also displayed in a user’s bookmark bar or list. Your favicon will appear as a blank page until you customize it.
Change your favicon
Your site’s favicon is the small image that is displayed on the far-left edge of the browser tab when someone is visiting your site. Favicons are also displayed in a user’s bookmark bar or list. Your favicon will appear as a blank page until you customize it.

- Go to the General tab of the settings editor
- Click the image icon in the favicon section to change or upload a new image
 |
Pro Tip: Your favicon is a small but important detail that affects the first impressions of your site’s visitors; it’s vital to establishing credibility and just as important as the other branding elements on your site. Use one that reflects your group’s logo or brand. Optimal size is 64 x 64 pixels. The best format is .png. If your favicon has a transparent background and it is saved as .jpg, the background will appear white.
|
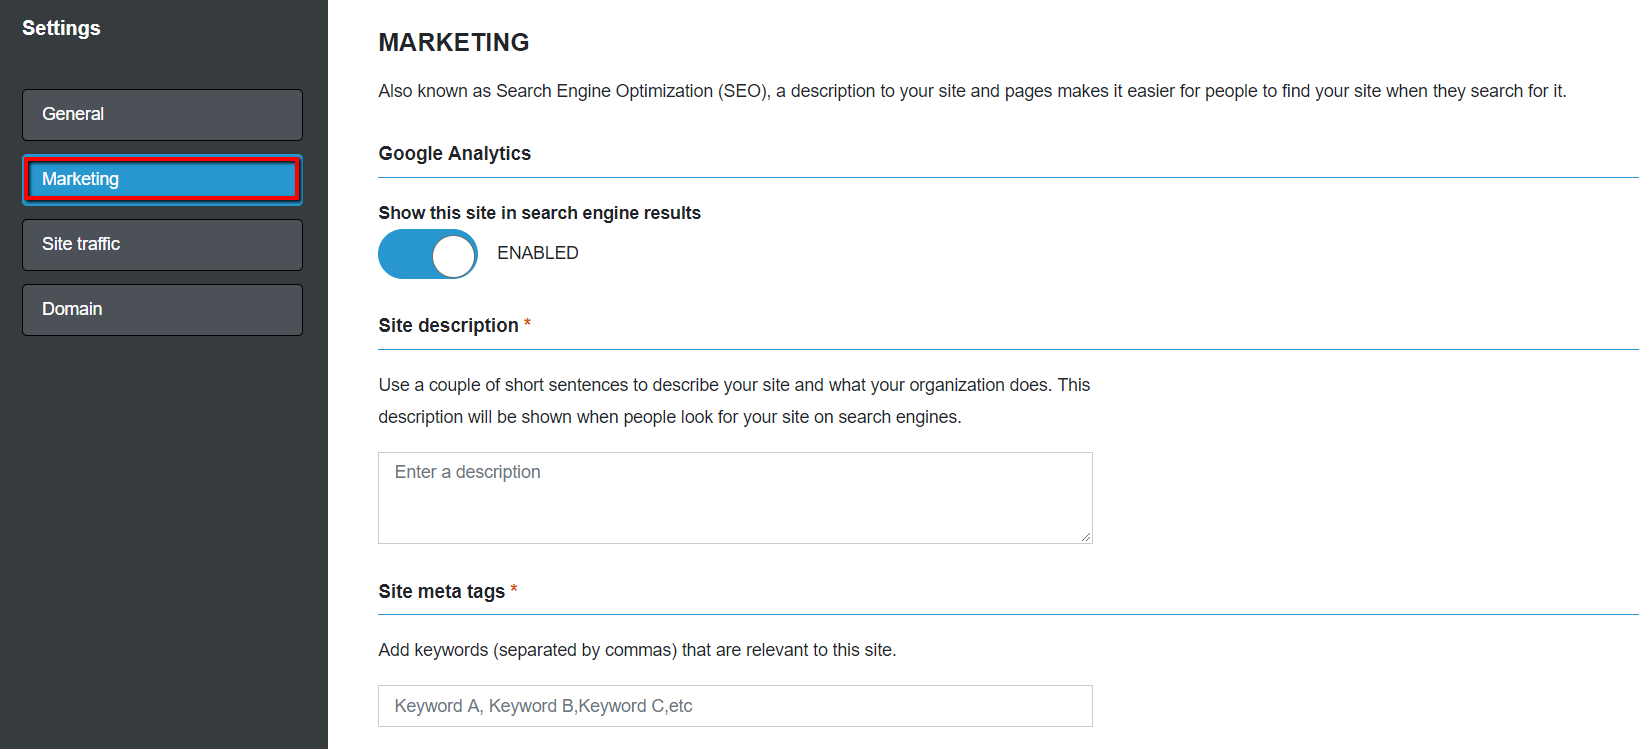
Change how people can find your site (search engine settings)
Key factors that affect traffic to your site include how it appears in search engine results, and how accurate its search engine description is. Editing your site description and meta tags to take advantage of keywords is considered an SEO best practice. Meta tags are snippets of text placed within your site’s HTML code (not visible on the page itself), which help tell search engines what your web page is about. If you do not edit your site description or meta tags, search engines will display text based on relevancy to a search query.
To hide your site in search engine results, go to the Marketing tab of the settings editor and click the toggle button in the search engine results section. You should see it switch from Enabled to a Disabled setting.
 |
Pro Tip: Your site description is sometimes used as the snippet of text that appears beneath a link when you share your site on social media. Keep your description concise to avoid having it appear truncated in search results and on social media. The limit is usually 160 characters or less.
|
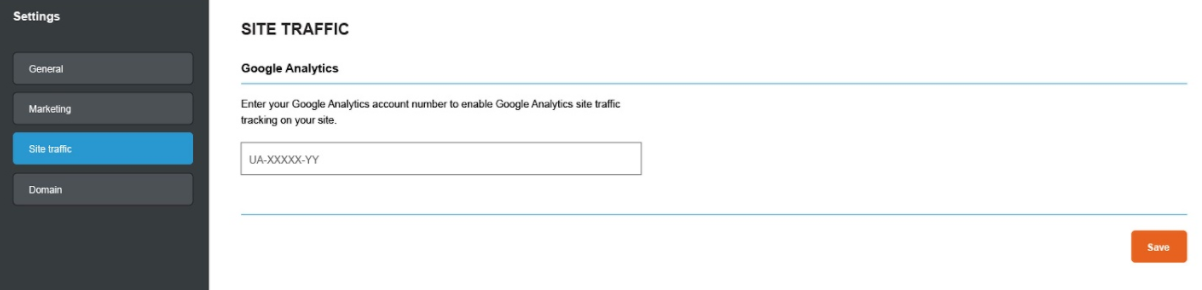
Track your site
In order to track who is coming to your site, you can link a Google Analytics account to your site on the Site Traffic tab of the settings editor. You will need to create a Google Analytics account if you don’t already have one. To track your site, Google uses a tracking ID, which you can get by following these steps
1. In your Google Analytics account, click Admin
2. Select an account from the menu in the Account column
3. Select a property from the menu in the Property column
4. Under Property, click Tracking Info > Tracking Code Your tracking ID will be displayed at the top of the page.
5. In Site Builder, click on the Site Traffic tab of the settings editor
6. Copy and paste your Google Analytics tracking ID in the field provided
7. Click Save
Change how people visit your site
The benefit of having an easily recognizable URL for your website is that it is easier for visitors to remember. Your default domain has been predetermined by headquarters and will be automatically populated. You should not modify your default domain because it is already synced to GHIN to allow your members easy registration access. Your default site URL will appear as [ClubName].memberplanet.com.
If you wish to purchase a custom domain, please contact memberplanet for details: 888-298-8845